If you’re reading this you probably are using a Mac and are trying to connect to your server via ssh using a ppk file from PuTTY.
In the example below we use the build-in ssh client Terminal. Lets get started
Your PuTTY ppk generated files need to be converted to OpenSSH files. This can only be done in windows using PuTTYgen. I have not yet found an application or method that allows you to convert the ppk key on a mac.
Download PuTTYgen from here: PuTTYgen
Open it. Open your PPK file. Export the key to OpenSSH and save.
Back in OSX – Copy or move the new openssh key file to your .ssh folder
linux$ cp your_key_mac ~/.ssh
We now need to give the file the right permissions. Terminal will refuse to use the key if it is open to Groups and users. chmod your file
linux$ chmod 600 your_key_file
We are now ready to use this key in our terminal connections.
Open Terminal and use this connect
linux$ ssh root@192.168.0.1 -p 123 -i ~/.ssh/ssh_key_file
You should be able to login now. the -p is for your port number. -i is for identification.
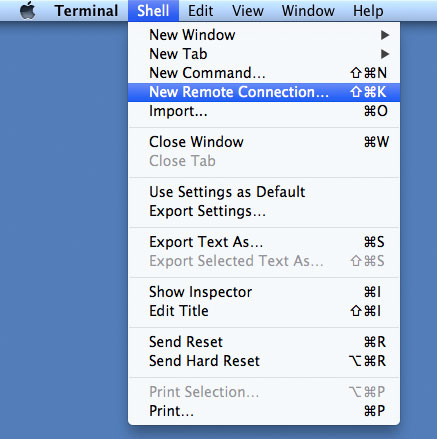
Using the above and typing it over and over to connect seems like a whole process on its own each time. Luckily Terminal allows us to save sessions. It is not as user friendly or advanced as PuTTY, but it gets the job done. Let’s save the details. Open Terminal and click on Shell then New Remote connection.
Click on Secure Shell (ssh). Under user fill in root.
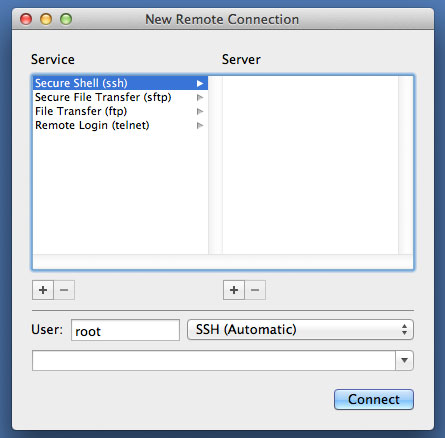
Now click on the + sign on the right hand side under server and add the server details including the location of your key file.
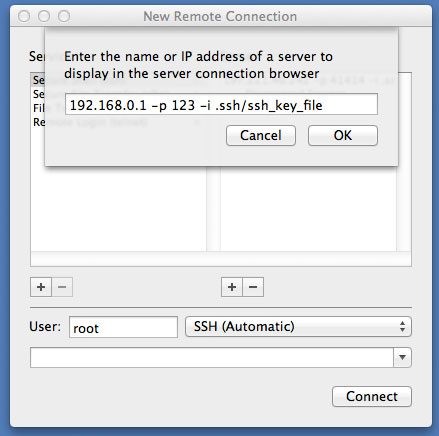
Note: We need to remove the ssh part, root@ and the ~/ from the line if we are saving the connection. Your line should look like this.
192.168.0.1 -p 123 -i .ssh/ssh_key_file
Hit Ok and then connect. Your details are now saved 😉